

EHT explores some basic roof framing techniques, from layout to installation.
Rooftop outlining is one of those craftsman abilities that shows up very confounded, and for sure, some rooftop plans are troublesome. If you have any problems with it, contact crm property management. Rooftops are fundamentally five sorts: shed, peak, hip, gambrel, and mansard. One more typical plan in the Northeast is the “saltbox,” which is a peak rooftop with one long side.
Nowadays “cut-ups,” or rooftops with a ton of valleys, dormers, and different highlights, are progressively well known. By and large with bought house designs, the subtleties of the rooftop development, including beam configuration, are incorporated. Pre-developed brackets have additionally become progressively well known.
They are developed at a manufacturing plant to match your structure and followed through on location. They do, notwithstanding, require additional labor and lifting gear to introduce set up.
You can likewise assemble your own supports assuming that you have the hardware or can lease the gear to introduce them.
Piece-by-piece beam/rooftop development, nonetheless, is as yet the more normal development technique for some structures. Straightforward rooftops, like a shed or the normal peak, are genuinely simple to build, even without plans, assuming that you comprehend the fundamentals and a little math.
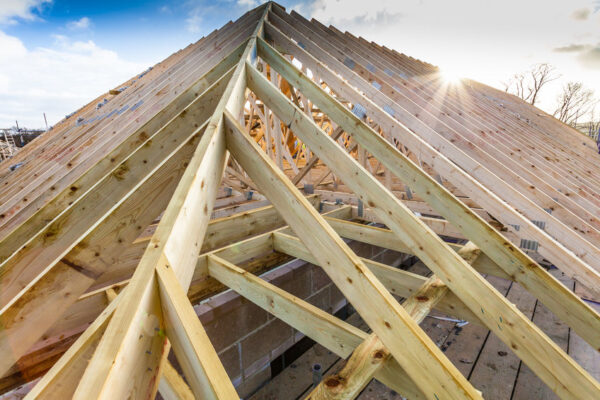
To construct any however a shed-type rooftop, including supports, you’ll need to initially decide a couple of variables; the range, rise, run and line length. For a shed rooftop, you just need to know the ascent, range, and line length. Length is the estimation across the structure from outside supporting divider to outside supporting divider.
Run is a large portion of the distance of the range. Rise is the estimation from the centerline of the range to the highest point of the rooftop line. Line length is the estimation from an external perspective of the supporting divider line to the centerline of the rooftop at the highest point of the ascent.
Essentially you’re working with a triangle with two legs and the line length for a hypotenuse.
How To Determine Roof Pitch
You will likewise have to know the ideal pitch of the rooftop. Pitch is the slant or point from the divider plate to the rooftop edge line. Pitch can shift an extraordinary arrangement, from a shallow slant up to an exceptionally steep pitch.
Pitch for a peak rooftop, the most well-known, is by and large 1/4 or 1/3; which is equivalent to 1/4 or 1/3 the all-out range of the structure, not including any shade. Pitch likewise has its own meaning, dictated by the ascent in crawls in 12 inches. For example, a 4/12 pitch signifies a rooftop rising 4 crawls for every 12 inches.
Having the right pitch is significant. In many cases, a specific pitch might be important or even needed by nearby codes. Pitch is controlled by snow loads, other climate factors, and the covering to be applied to the rooftop. For those in the northern pieces of the country, 8 of every 12 pitches, or more, is usually used to keep unnecessary snow loads off the rooftop.
Those in the southern environments might use lower pitches. The base pitch, notwithstanding, that can be utilized with many roofing materials, for example, black-top shingles or layered metal is 3 out of 12 (3/12 pitch).
For lower pitches, a developed or consistent roll material should be applied to keep the rooftop waterproof.
Rafter Layout
This article will talk about a peak rooftop, without valleys or dormers, since it’s the most normal and the least demanding for a first-time frame manufacturer to handle. Later you decide the ascent, range, run, line length, and pitch, the following stage is to spread out the rafters, or imprint the slices on an example crossbeam to make the rooftop.

There are three essential cuts utilized in making the crossbeam; the plumb cut at the highest point of the beam where it fits against the edge plate; the tail cut that makes the external edge of the structure overhang; and the bird’s mouth, which positions the crossbeam on the highest point of the divider plate.
We will show two techniques for spreading out rafters; one utilizing a conventional outlining (2-foot) square, and the second utilizing the new C.H. Hanson Pivot Square.
Hold the outlining square with the producer’s name up; this is known as the “face” of the square, and the contrary side is the “back.” The long arm of the square is the “edge,” and the short arm is the “tongue.”
In the model, we’ll utilize a 1/3 contribute as displayed in the drawing beneath, this implies an ascent of 8 crawls for every 12 creeps of the run (an 8/12 pitch rooftop). The initial step is to lay the square on the finish of the beam board and find 8 creeps on the tongue (the ascent), add skid steer attachments and 12 crawls on the sharp edge (the unit of run).
Measure from the point on the edge forthright on the tongue—it ought to be 14-7/16 inches. Duplicate this by the run of the structure. We’re involving 10 feet in this model, barring the shade. The subsequent figure is 144-1/2 inches. We add 12 crawls for the shade to get the last figure of 156-1/2 inches.
An outlining square is utilized to spread out the rafters.
Inspect the beam board to decide whether there is any bend or “crown” in the board. You should make this first example crossbeam on the straightest board you can find. On the off chance that there is any bend in the board, spread out the crossbeam so the crown is up or confronting away from you.
Experience has shown that the heaviness of the rooftop will slowly straighten this crown. (Assuming the crown were to be situated down, the rooftop could ultimately list.) Then spread out the crossbeam as displayed on the following page.
Cut the Pattern
Make a copy crossbeam from the example. Then, at that point, spread the rafters out on a smooth, level surface, with a 2-by between them at the edge line. Measure to ensure the ascent, run and length are right. You might wish to test these on the structure prior to cutting the remainder of the rafters.

When you’re certain these two example rafters are accurately cut, mark them as examples and imprint and cut the vital number of rafters. Assuming that the structure has hanging or “fly” rafters for the peak closes, cut them also. They don’t, notwithstanding, have the bird’s mouth cut.
Ensure you cautiously follow the example crossbeam. Various years prior I was developing a two-story building. One woodworker spread out and started to cut the rafters. He turned out to be sick from the outrageous hotness of the day and one more craftsman took over for the last third of the rafters.
At the point when the rooftop outlining was finished and decking introduced, there was an implicit list. I couldn’t say whether the subsequent craftsman didn’t utilize the example beam, or basically wasn’t as exact, yet it was an exorbitant misstep. So with these tips and advice, you should consider getting same day loans and start building by yourself.